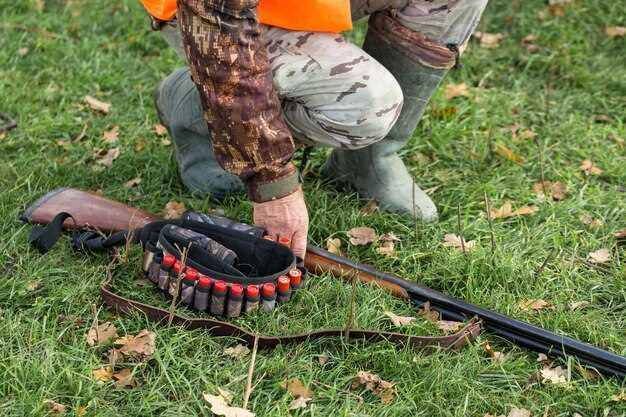
After an exhilarating day in the field, the last thing you want is for your firearm to suffer from improper maintenance. A muddy hunt can leave your gun exposed to dirt, moisture, and debris, which can lead to corrosion, jams, and decreased performance. Thus, understanding how to clean your gun effectively is crucial to ensure its longevity and reliable operation.
Maintenance of your firearm begins immediately after you return from your hunt. It is essential to address any mud or grime that may have accumulated on the exterior and, more importantly, the internal components. Even small particles of dirt can become entrenched in the mechanisms, leading to more significant problems if left unattended.
In the following sections, we will break down the step-by-step process of cleaning your gun after a muddy outing. From disassembly to lubrication, we’ll provide you with the necessary techniques to restore your firearm to optimal condition, ensuring that it’s ready for the next adventure in the great outdoors.
Assessing Damage and Preparing the Cleaning Area
Before starting the cleaning process, it is crucial to assess any potential damage to the gun after a muddy hunt. Examine the external surfaces for any visible mud, debris, or scratches that might indicate wear. Pay special attention to the moving parts, such as the action and trigger mechanism, for any signs of obstruction that could affect functionality.
Next, inspect the barrel and chamber for blockages or rust. Using a flashlight can help illuminate any debris lodged inside, which can lead to serious issues if not addressed. If you notice any signs of damage such as dents or corrosion, document them, as this may require professional servicing.
Once you have thoroughly assessed the condition of your gun, it is time to prepare the cleaning area. Choose a well-lit, clutter-free space that allows for easy access to all your cleaning supplies. Lay down a protective mat or cloth to catch any oils or solvents and to avoid scratches on surfaces.
Gather all necessary cleaning tools, including brushes, patches, cleaning rods, gun oil, and a cleaning solvent specific to your type of gun. Organizing these supplies in advance will streamline the cleaning process and enhance efficiency. Ensure that you have proper ventilation, especially if you are using solvents or oils, to maintain a safe environment while cleaning your firearm.
Step-by-Step Cleaning Process for Different Gun Types

Proper maintenance is crucial for ensuring the longevity and performance of your firearm. This section outlines the cleaning process tailored for various gun types: rifles, shotguns, and handguns. Each type requires specific attention to detail to safeguard against rust and operational issues post-hunt.
Rifles
1. Begin by disassembling the rifle according to the manufacturer’s guidelines. Remove the bolt and magazine to prevent accidental discharge.
2. Use a cleaning rod with a patch holder and appropriate caliber patches to clean the bore. Apply a solvent to the patch and push it through the barrel from the breech to the muzzle. Repeat this process until the patches come out clean.
3. Follow up with a brass brush to remove any fouling. Clean the chamber using a chamber brush, ensuring all debris is eliminated.
4. Wipe down the metal surfaces with a cloth dipped in gun oil to protect against moisture.
5. Reassemble the rifle, lightly oiling any pivot points or moving parts as needed.
Shotguns
1. Unload the shotgun and remove the barrel from the receiver to start the cleaning process safely.
2. Use a cleaning rod with a specialized shotgun brush to scrub the barrel, applying a suitable solvent. Make several passes to ensure cleanliness.
3. After brushing, use a patch to wipe out the barrel until it appears clean. Pay close attention to the chamber and forcing cone areas.
4. Clean the trigger assembly and receiver with a dry cloth or a soft brush, ensuring no debris remains.
5. Lastly, apply a light layer of oil to the barrel and other metal components to prevent corrosion.
Handguns
1. Ensure the handgun is unloaded, removing the magazine and visually inspecting the chamber for ammunition.
2. Disassemble the firearm according to the manufacturer’s instructions to expose various internal components.
3. Clean the barrel with a rod and a bore brush, as well as patches soaked in solvent, following the process until the patches show no residue.
4. Wipe down the frame, slide, and all components with a soft cloth to remove any dirt or grease.
5. Apply a small amount of gun oil on contact points, moving parts, and inside the slide to ensure smooth operation.
Following this detailed maintenance guide will ensure that your firearm remains in optimal condition after a muddy hunt, ready for your next adventure.
Post-Cleaning Maintenance Tips to Prevent Future Issues

After thoroughly cleaning your gun post-muddy hunt, follow these maintenance tips to ensure its longevity and reliability:
- Regular Lubrication: Apply a quality gun oil to the moving parts and any surfaces prone to friction. Regular lubrication prevents rust and ensures smooth operation.
- Check for Residues: After cleaning, inspect for any remaining dirt or debris that might not have been removed. Use a soft cloth to wipe down all surfaces thoroughly.
- Store Properly: Place your gun in a dry, cool place. Using a dedicated gun case or safe helps protect it from environmental factors that could cause corrosion.
- Periodic Inspections: Schedule regular inspections of your gun, checking for signs of wear, rust, or malfunction. Early detection can prevent more significant issues.
- Avoid Moisture: Make sure to keep any cleaning gear away from moisture. Store cleaning kits in a sealed container to prevent humidity from affecting the supplies.
- Use Quality Products: Invest in high-quality cleaning supplies, oils, and solvents. Using subpar products can lead to inadequate cleaning and unnecessary wear on the gun.
- Follow Manufacturer’s Guidelines: Adhere to the cleaning and maintenance recommendations provided by the gun’s manufacturer. Each firearm may have specific needs based on its design and materials.
By incorporating these maintenance practices, you can enhance the performance of your gun and reduce the likelihood of issues arising in the future.


